Reference articles
https://docs.blender.org/manual/en/latest/render/color_management.html
https://rmanwiki.pixar.com/display/REN24/Color+Management
https://www.arri.com/en/learn-help/learn-help-camera-system/camera-workflow/image-science/aces
https://github.com/colour-science/OpenColorIO-Configs
https://acescentral.com/knowledge-base-2/using-aces-reference-images/
https://opencolorio.readthedocs.io/en/latest/configurations/aces_1.0.3.html
Talk about Gamma Correction

Table[x^2.2, {x, 0, 1, 0.1}]
{0., 0.00630957, 0.0289912, 0.0707403, 0.133209, 0.217638, 0.325037, \
0.456263, 0.612066, 0.79311, 1.}

Table[x, {x, 0, 1, 0.1}]
{0., 0.1, 0.2, 0.3, 0.4, 0.5, 0.6, 0.7, 0.8, 0.9, 1.}

Table[x^(1/2.2), {x, 0, 1, 0.1}]
{0., 0.351119, 0.481157, 0.578533, 0.659353, 0.72974, 0.792793, \
0.850335, 0.903545, 0.953238, 1.}

#^2.2 & /@ Table[x^(1/2.2), {x, 0, 1, 0.1}]
{0., 0.1, 0.2, 0.3, 0.4, 0.5, 0.6, 0.7, 0.8, 0.9, 1.}
To get a preliminary understanding of the gamma function, it can be seen from the above expression that the transformation obtained by the gamma function 2.2, we can keep the input and output in a linear relationship by the inverse gamma function 1/2.2.
For the early electronic picture tube, as the input voltage increases, the screen brightness and voltage is not a linear relationship, but non-linear, we call it gamma compression (gamma compression), the brightness of the picture if not done gamma expansion (gamma expansion), then we see the image on the monitor than the reality of seeing the actual Shoot the object to be darker, why, the reality of the light brightness is linear. In order to get the correct linear image, we need to add the gamma correction (Gamma Correction) function in the image storage, that is, the above gamma expansion function, then after the gamma compression of the CRT monitor, the image obtained is Linear gamma correction image, we can see that the image is no longer dark, and the brightness of the real object to maintain the same, with the explanation of linear and gamma, we introduce the content of the linear space, the reader will be easy to understand.

Let’s take the example of color management in Blender.
OpenEXR Image:

sRGB Texture Image:


Blender works in linear colorspace, any input image needs to be converted to linear space by Blender’s color management system for calculation. In the EXR display above, we can see that the exposure in linear space increases by one stop and the brightness is simply linearly increased, in the non-linear space on the right, our eyes look at the image and feel that the exposure has increased by several stops. In the display of Texture, when the exposure is increased by twice, the picture in the left non-linear space has begun to overexpose, while the picture in the right linear space we can still see some details in the highlights, this is the benefit of working in linear space, we can finely adjust the picture parameters, as well as the correct handling of the physical world of lighting calculations.
ACES color space
Several concepts need to be mentioned here for definition.
-
Scene chromaticity description: the luminance and hue of a real or synthetic object captured with a real or virtual camera.
-
Display Chroma Description: Describes the luminance and hue rendered by the device when restoring the scene to the viewer.
-
Colorspace: The range of colors displayed. The range of colors that can be captured by the human eye is different from the range of colors that can be rendered by the electronic devices we make, which gives rise to the definition of a different colorspace.
In the traditional photochemical film production process, the naked eye observes the scene color as scene chroma, the image state of the developed negative is called scene reference, the image state of the film print is called display reference, and what is presented to the viewer on the movie theater screen is display chroma.
ACES (Academy Color Encoding System) Academy color management system, mainly used for color management of digital images. In the process of shooting a movie, the cinematographer may use different types of movie cameras, for the same scene, different cameras capture the scene chromaticity range are different, there are also post-production special effects synthesis is done on the computer, so how to unify the color output of these devices, so as to achieve a uniform display chromaticity, which requires color management, and ACES is the implementation of such color management.
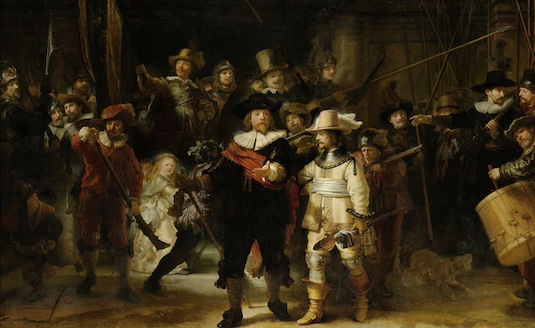
When the brightness of the display reference is much lower than the brightness of the scene reference, just scaling the brightness of the color does not produce an attractive image, in order to make the image more attractive, you need to use the rendering transformation to make the scene chroma converted to display chroma, this rendering we can see from the cover of the blog Rembrandt “Night Parade” a non-realistic but visually pleasing image, the shadows darken and highlights enhanced by the effect. Before the advent of ACES, there was no such explicit conversion step, and traditional film photographers would complete the transition from scene reference to display reference by chemically processing the film in post, and allowing the image to display artistic beauty. ACES provides a two-step rendering process, where scene reference to display reference is accomplished by observing the transformation, which is done through two tandem processes, the first being the Reference Rendering Transform ( The first is the Reference Rendering Transform (RRT), and the second is the Display Output Transform (ODT). The RRT is responsible for giving the output of an imaginary device with no color gamut and no luminance limitations aesthetic properties like film imaging, and the ODT adapts this ideal image to specific ODT adapts this ideal image to specific types of displays, such as movie theater screens, computer screens, monitor screens, cell phones, etc.
Here is how ACES compares to other color gamut ranges, our usual computer screen cell phones have Rec709 or sRGB color gamut, movie theater screens have DCI-P3 display color gamut, and ACES2065 has almost all color gamut ranges.

Unlike the limited color space of cameras and monitors, the core color space of ACES includes all the colors that the human eye can see, as well as more than 30 stops of the luminance dynamic range (tolerance). A color and luminance information, which no creator in the history of film can store color details to this extent. But seeing and storing is different from capturing and mastering.
In the early days of film, the quality of the captured image declined steadily as the production process moved down the pipeline, with camera negatives having the best image quality, then losing image quality with each step of photochemical processing and release prints, and in the pre-digital era, image quality also showed a steep decline with each step of digital processing. When processed in an ACES workflow, each step of image processing and output ensures maximum color fidelity and dynamic range with the scene data captured by the camera until the image needs to be assigned to a specific output device for viewing, at which point image quality is lost.
Post-production
First we need to introduce LUT (lookup table), in the digital world, especially in film and TV post-production compositing, usually in a linear color space for color matching and image compositing, the image seen on the artist’s monitor will be a dim image, this is due to our monitor has Gamma 2.2 transformation, which makes the overall brightness of the image darker, and this time we need to keep the image still working in linear space, and the monitor sees a normal brightness and color image, which requires adding a display LUT, without changing the image data, adding a Gamma 1/2.2 inverse transform to the monitor, this LUT is called display Gamma correction LUT.
ACES color management is somewhat like a LUT, but ACES can handle colors beyond the expected color space. In the ACES workflow, all camera-taken images or computer-generated images are first converted to a uniform ACES 2065 color space, and when this data needs to be viewed on a specific device, ACES converts the image to the same color space as the viewing device This step is the ODT described above.


If you look at the same computer screen with the same scene as above but with different color gamut information, you will see a different picture because the computer screen is in sRGB color gamut and cannot correctly display images in DCI-P3 and REC.2020 HDR color gamut.
Specific steps for ACES ODT:
-
An optional appearance conversion, such as a film simulation of the image.
-
Convert the image to an idealized device, a device with a large dynamic range and a color space as large as ACES2065, to which the RRT converts the data, a step that prepares the image data for current and future displays.
-
A final conversion is performed on the output of the RRT to match the specific dynamic range and specific color gamut of the target display.
Now let’s introduce IDT (Input Device Transform), the presentation of movie scenes on the screen, first of all, depends on our camera to record the shooting, the picture data captured by the camera will be converted or mapped to the ACES2065 color space, in this maximized color space encompasses all the color range that the human eye can see, and record ACES can also capture any color detail in the film, remember any detail, and we can assume that the conversion of the film footage to digital media in the ACES2065 color space is lossless. On the set of a film production, there may be different brands of cameras on the set, and the color space of the final image may be different, like with Alexa cameras, the output is Alexa WideGamut space, and with RED cameras, the output is RED Wide Gamut RGB color space, how to convert these different color space image How to convert these different color space image data to the same color space, so as to facilitate the post-processing of uniform processing, here need to use the ACES color management system.
The ACES color management system is needed here.

How to convert different camera color spaces to ACES color space requires the assistance of IDT. The camera developer will develop IDT for a specific camera to accurately map the chip’s color space to ACES2065.
Terminology
ACES(system): Abbreviation for Academy Color Encoding System, a free, open, device-independent framework for color management and image exchange.
ACES Reference Input Capture Device: A mathematically based model of an imaginary camera that sees all the color information a human can see.
ACES2065: The core color code of ACES, from which all other codes are derived, this color space is capable of encoding every color visible to the human eye.
ACEScc: Logarithmic color coding, optimized for color mixing tools. It is a temporary workspace and is not recommended to be stored in files or exchanged.
ACEScg: Linearly encoded color space, used in computer graphics rendering and compositing tools, it is required to convert ACEScg images to ACES2065 when swapping files.
ACESproxy: Logarithmic color coding used to move video images between video devices in order to work under the media of video transmission.
Camera Raw Data: Camera raw images, also known as RAW, unprocessed image data.
Practice
I will use BMPPC (blackmagic pocket cinema camera) to shoot some scenes and apply the basic ACES color management process to these clips. I will write a blog to explain the production techniques and the difficulties and solutions encountered during the production process after each short film.
Supplementary
ACES aims to:
-
To build a digital file format for storage and exchange, where the color management in the file does not depend on any camera, display device, and tools in post-production.
-
This color management system can be compatible with new technologies such as HDR, and wide color gamut.
-
It can be applied to standard workflows to reduce production costs.
-
The system is free and open.
The advantage of ACES is that from camera start-up shooting to post-production film footage, and then to final cinema distribution and screening, the film footage color consistency can be guaranteed without false color shifts.
Key point: whether rendering output or file exchange, we need to pay attention to ACEScc, ACEScct, ACEScg are working color space, not applicable to the final file color space, we work in these color space, the final output rendering color space need to return to ACES2065-1, this is a very important point.

Next, we introduce about the linear workspace. The human eye’s perception of the light and brightness of the objects we see is non-linear, and in the post-production of images, especially special effects compositing, which requires the generation of a large number of CG images and the synthesis of real images, the calculation of the image needs to be linear, such as doubling the brightness then the light of the whole scene is doubled, and due to the non-linear nature of the human eye, in the case of low light, the human eye’s feedback to the scene is like increased In the case of high luminance, the human eye feels that the light of the whole scene is not brighter because an additional light has been added. The physical world is linear and the human eye’s perception of the world is nonlinear, so how to make the image on the monitor looks the same as the real environment it, which requires the use of Gamma, the camera in the shooting scene screen, in order to better retain the low-light and high-light areas of information, simulating the non-linear light sensitivity of the human eye, the image to do a gamma compression, that is to expand the range of highlights and dark areas, such as in case of doubt see the introduction of gamma in the beginning part, when the monitor displays the image, the monitor needs to do a reverse gamma decoding of that gamma compression, so that the image returns to the real world linear space, and the image seen by the human eye and the image displayed on the monitor match, if no gamma decoding is done, the image will be displayed especially bright, and conversely, if the camera captured images without specific gamma compression, that is, the image is saved directly in linear space, then after the gamma correction of the monitor, the human eye sees the image on the monitor is much darker than the actual scene. So why work in linear space, because this way you can get physically realistic lighting and different gamma values will cause the image color shift. Exactly how to convert an image with gamma compression to linear space, but still allow the human eye to see a normal image, we can follow these steps to accomplish this, the EXR file format developed by Industrial Light & Magic saves the image in linear space i.e. Gamma=1.0. Although the image works in linear space, we add a sRGB Lut to the monitor, this Lut is equivalent to Gamma compression and restores our display image to normal brightness, but remember that the image works in linear space all the time after the second step of linear processing, and the Lut only works on the display.

So is there a tool that can help us manage these color spaces automatically, for example, when the visual effects department gets sRGB, EXR, etc. files, the tool automatically helps us switch to linear space when loading these images, including loading the display Lut, this tool is the color management system, let’s briefly introduce ACES color management, through a simple example to end this chapter.
We use Renderman’s own It tool to load an HDR image in sRGB linear space. If we open it directly through the system’s own image viewer without color management, we will find that the entire highlight area is overexposed without any details.
A normal HDR image is displayed:

Image display without color management:

Image display under ACES color management:

Let’s look at the standard color card again, and increase the color card exposure by one stop in linear space to see how the specific RGB color values (marked by the gray box) change.
The sRGB monitor shows.


The RGB value of the gray square at the marker changes to (138,139,139) -> (188,188,188), because the sRGB display Lut is loaded so we see a non-linear RGB color value.
Raw display (meaning no display Lut is loaded).


The RGB value of the gray square at the marker changes to (90,90,90) -> (179,179,179), which shows that after doubling the exposure, the RGB also doubles, which is what happens when we work in linear space.